
Have you ever gotten annoyed by ads constantly popping up on your iPhone? Or felt worried about your browsing data being tracked? Don’t worry, in this article, we’re going to casually talk about how to set up AdGuard DNS on your iPhone so your browsing experience becomes safer and smoother. Let’s dive in!
Understanding DNS and How It Works
What is DNS?
Bayangin kamu mau mampir ke sebuah kafe kekinian. Nah, nama kafe itu nggak lantas langsung ngasih alamat jalan. Kamu butuh peta atau petunjuk arah, kan? DNS (Domain Name System) itu semacam “peta” bagi internet. Saat kamu ketik ”www.example.com”, DNS yang bertugas menerjemahkannya jadi alamat IP server yang nyimpen konten. Gampangnya, DNS itu penerjemah nama domain ke alamat IP.
Why is DNS Important for iPhones?
On an iPhone, every internet connection—whether via Wi-Fi or cellular—goes through a DNS server. If the DNS server is slow, you’ll feel it: laggy browsing, slow loading, or even failure to load sites. DNS also plays a big role in security, as certain DNS services can filter out harmful content, ads, or trackers.
Getting to Know AdGuard DNS
What is AdGuard DNS?
AdGuard DNS is a public DNS service created by the AdGuard team—a well-known name in ad-blocking solutions. Unlike standard public DNS servers, AdGuard DNS is focused specifically on blocking ads, trackers, and harmful sites. So while you browse, it helps keep annoying ads and phishing attempts out of your way.
Advantages of AdGuard DNS Over Regular DNS
Regular DNS servers just translate domain names to IPs—nothing more. AdGuard DNS, on the other hand, has some special powers:
Blocks Ads and Tracking
Ads in apps and websites can really slow things down and ruin the experience. AdGuard DNS works at the network level, automatically “filtering out” ad server requests before they reach your iPhone. The result? Cleaner interfaces, faster loading, and even longer battery life since your phone isn’t wasting energy loading ads.
Extra Security
Beyond ads, there are plenty of malicious websites and trackers that want your data. AdGuard DNS has a blacklist of those domains and blocks them instantly. Imagine it as a bodyguard who stops shady people at the gate—only the trusted ones get through.
Preparation Before Setting Up DNS
Make Sure Your iPhone Is Connected to the Internet
First things first, check your connection. Whether you’re using home Wi-Fi, office Wi-Fi, or cellular data, make sure your signal is strong and the internet is working. If you’re not connected, the DNS changes won’t take effect.
Note Down the Old DNS Settings (Optional)
If you’ve set a custom DNS before, it’s a good idea to write it down. That way, if something goes wrong or you want to switch back, you can easily restore the old settings. Just jot it down in Notes or take a screenshot for quick reference.
Step-by-Step: Setting Up AdGuard DNS on iOS
Accessing Wi-Fi Settings
- Open the Settings app on iPhone
- Tap Wi-Fi
- Find the Wi-Fi network you’re connected to and tap the little “i” icon next to it
Manually Configuring DNS
- Scroll down and find Configure DNS
- Tap it, then switch from Automatic to Manual
Adding Primary and Secondary DNS Servers
- Under DNS Servers, tap Add Server
- Enter the AdGuard DNS addresses:
- 176.103.130.130 (Primary)
- 176.103.130.131 (Secondary)
- Delete or slide to remove any old DNS addresses if you want AdGuard to be the only one used
Saving and Applying the Settings
- After entering the new DNS addresses, tap Save in the top-right corner
- Your iPhone will automatically apply the new DNS to that Wi-Fi network
- Open Safari and visit a few sites to check if everything’s working
Setting AdGuard DNS for Cellular Networks (iOS 15 and Above)
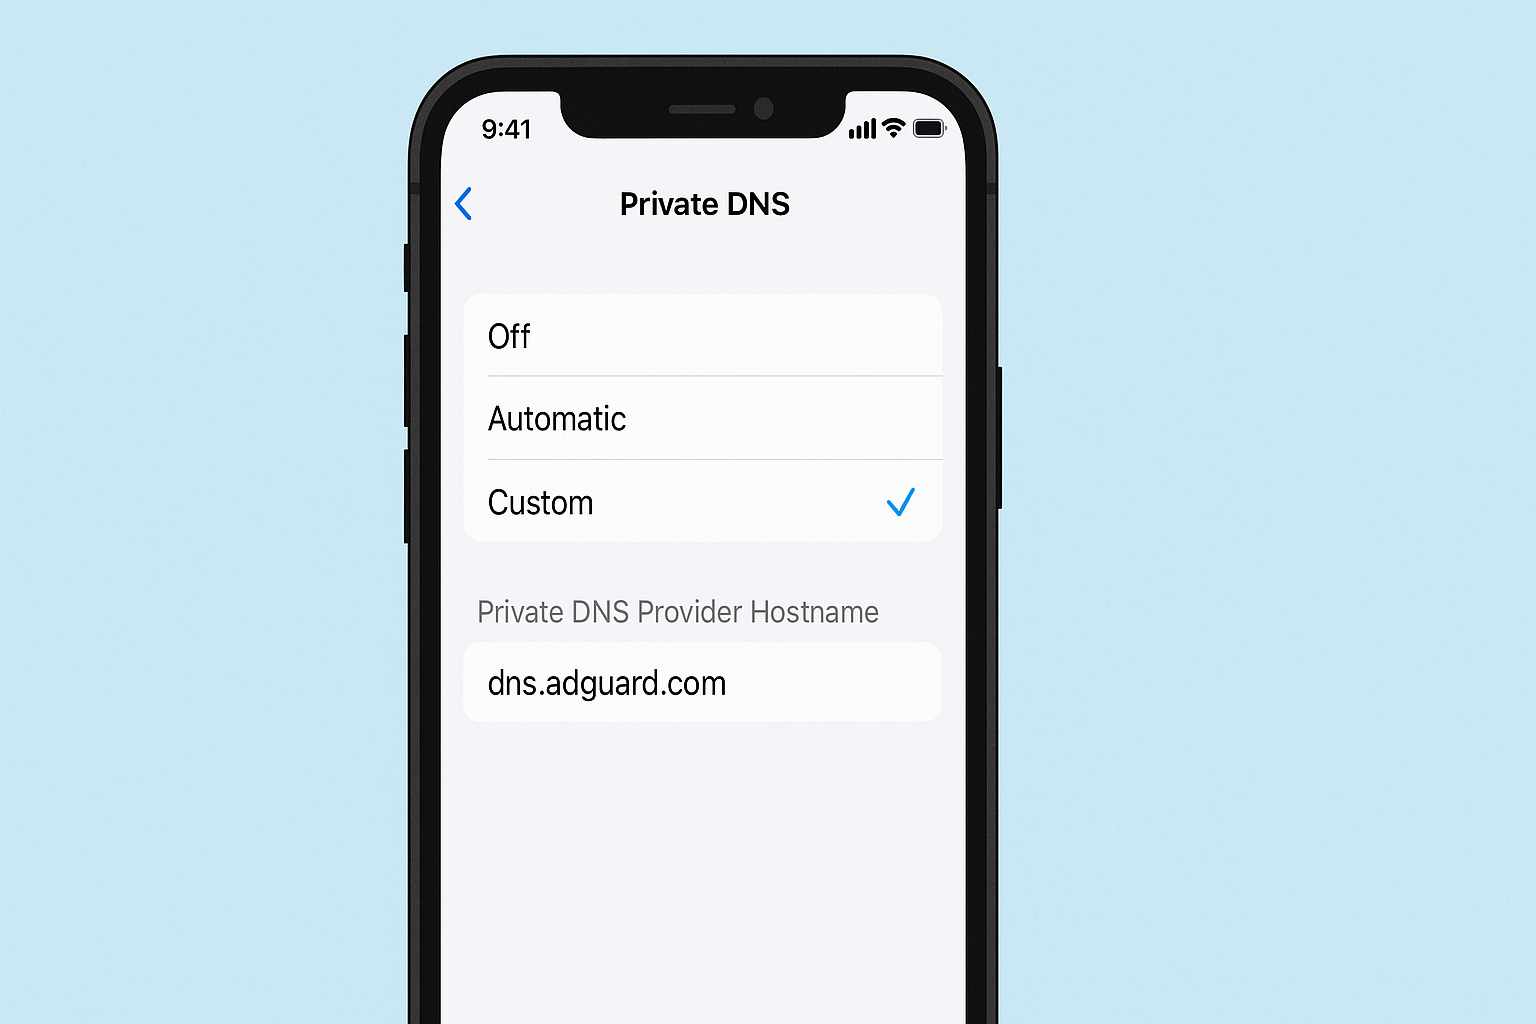
iOS 15 introduced Private DNS (DoH) through the Shortcutsapp. This is useful if you switch between Wi-Fi and mobile data often and want AdGuard DNS to stay active on cellular too.
Using the Shortcuts App
- Open the Shortcuts app on iPhone
- Tap the “+” icon to create a new shortcut
- Select Add Action, then search for Set DNS Server (if available)
- Set the protocol to DNS-over-HTTPS (DoH)and enter this AdGuard DoH URL: https://dns.adguard.com/dns-query
- Simpan pintasan, beri nama misalnya Adguard DNS Seluler
- Once done, run this shortcut every time you enable cellular data or change networks
Verifying DNS on Mobile Network
- Open Safari or Chrome
- Visit a DNS test site like dnsleaktest.com or 1.1.1.1/help
- Check that “AdGuard DNS” appears in the “Resolver” or result
- If your ISP DNS still shows up, make sure the shortcut ran successfully
Testing and Checking DNS Settings
Using Browser to Test Ad Blocking
Try visiting an ad-heavy site like a free news portal. If the usual banners and pop-ups are gone, AdGuard DNS is doing its job. It’s like having a bouncer who turns away the annoying guys at the door.
Checking Speed and Stability
Custom DNS can sometimes affect loading speed. To test:
- Open Speedtest.net via app or browser
- Run a test (ping, download, upload)
- Compare with speeds before using AdGuard DNS
Using Third-Party Apps for DNS Testing
If you want a deeper look, install apps like DNSCloak or 1.1.1.1 by Cloudflare. These tools show response times, block stats, and DNS queries.
Troubleshooting Common Issues
DNS Not Working
If you change the DNS and suddenly can’t browse at all:
- Double-check the AdGuard addresses (176.103.130.130 / 176.103.130.131)
- Try troggling Wi-Fi or turning on Airplane Mode briefly
- Reboot your iPhone and try again
Internet Connection Slows Down
Custom DNS can occasionally cause slowdowns. If things feel sluggish:
- Try switching the primary and secondary DNS
- Ensure your Wi-Fi or signal is strong
- Temporarily test another DNS like Google DNS (8.8.8.8 / 8.8.4.4) for comparison
Some Apps Won’t Connect
Certain apps might need access to domains blocked by AdGuard. Fix it like this:
- Identify which domain the app needs
- Add it to a whitelist (if using the full AdGuard app)
- Or switch back to automatic DNS temporarily for that app
Bonus Benefits and Tips
Tips to Maximize AdGuard DNS Use
- Share with friends using iPhones so when sharing hotspots, the benefit continues
- If you have a custom router, set AdGuard DNS at the router level to cover all devices at home
- Make a note of when you last changed DNS in case you want to update again later
Combining with VPN or Privacy Mode
AdGuard DNS blocks ads and trackers, but not traffic encryption. For full protection:
- Use a VPN to encrypt your internet traffic
- Pair it with AdGuard DNS to filter bad stuff before it loads
- It’s like wearing a raincoat and holding an umbrella at the same time—double protection
Regularly Update DNS Lists
AdGuard regularly updates its blocklists. Check their official site or social media for new IPs or changes so you’re always protected with the latest rules.
Conclusion
Setting up AdGuard DNS on your iPhone is actually pretty simple. You just need to tweak the DNS settings for your Wi-Fi or use a shortcut for mobile data. With that done, your browsing gets faster, cleaner, and more private. It’s like installing a water filter at home—the water still flows, but all the gunk gets filtered out. Give it a try and enjoy your cleaner internet!
FAQs
1. Can I use AdGuard DNS on all iOS versions?
Yes, but the setup differs. Older iOS versions only allow DNS changes via Wi-Fi settings. iOS 15 and above support DNS-over-HTTPS via Shortcuts for mobile data too.
2. How do I temporarily disable AdGuard DNS?
Just go back to Settings > Wi-Fi > Configure DNS > Automatic. Or disable the DNS shortcut for mobile data.
3. Does AdGuard DNS use a lot of mobile data?
Not at all. DNS requests are tiny. In fact, blocking ads saves data because the ads don’t load.
4. Is there a security risk in using public DNS like AdGuard?
As long as the source is trusted (and AdGuard is), it’s safe. In fact, it improves security by blocking malicious domains.
5. Can I use AdGuard DNS on office or campus networks?
Yes, as long as you’re allowed to change DNS settings. Some public networks restrict DNS changes, so check the network policy first.